
In the mid-1980s, I loved Phantom Slayer. Written for the Tandy Color Computer and made available for the Dragon 32, Phantom Slayer was a 3D maze shooter. Think a very basic version of Doom with colours but no textures. It wasn’t sophisticated, but it was quick and, more to the point, incredibly atmospheric.

I’ve always wanted to re-play Phantom Slayer. Sure I could run it under emulation, but my desire wasn’t just to play the game but to see if I could recreate it. And, for my latest Raspberry Pi Pico project, I have.
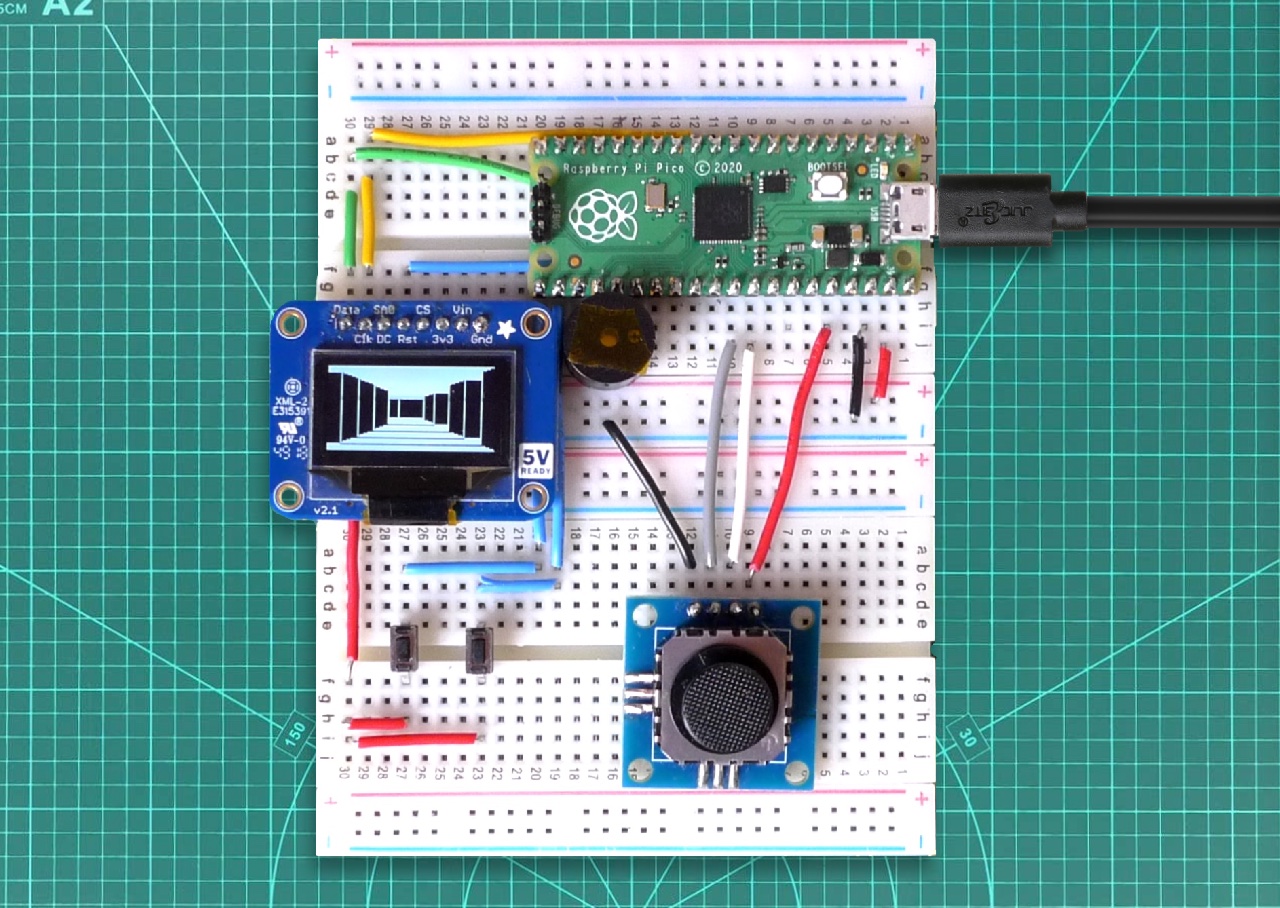
It’s a reasonably faithful re-creation of the original game. Rather than play the 6809 Phantom Slayer and take notes, I decided to rely entirely on memory and a handful of screenshots. And I wanted to use kit I had lying around. So the display of this miniature version is an 128 x 64 OLED panel that communicates with the Pico over I²C. There’s no Qwerty keyboard, just a couple of buttons: one to fire your laser gun, the other to trigger teleports. Sound comes courtesy of a tiny piezo buzzer.
How do you play? You move through a 3D maze looking for the titular Phantoms — who are also looking for you. One touch and you’re dead, so don’t get too close. You fight back with the speed of your running and your laser. At the start, one shot will put down a Phantom — though another will appear somewhere else in the maze to take its place — and they move slowly. As the game progresses, the Phantoms get tougher and faster. Your end is inevitable — it’s just a question of how long you can last.
And there’s no running and gunning. To fire the laser, you have to stop moving. Once fired, it takes two seconds to recharge. The Phantoms are canny — you can’t just sit and wait for them to wander into your sights.

When things get hairy, you can beam out — if you’ve found the maze’s single teleport square. Use it carefully — it can get out out of some tricky situations. But you’ll need to find it to use it.
Crucially, you also possess a Phantom Detector. When they get close, it will signal their nearby presence with a heartbeat. It’ll pick up any Phantom within range: about four maze squares.

Phantom Slayer was originally written by one Ken Kalish for Med Systems. It was built from an earlier maze game which connected text adventure components to a simple set of 3D-presented corridors. But Phantom Slayer was what captured my imagination.
How to build a Phantom Slayer console
Building the game yourself requires not only a Pico, but also the following components:
- One Adafruit SSD1306-based 128 x 64 OLED display or similar.
- One two-axis, self-centring analogue joystick.
- Two buttons.
- One piezo buzzer.
- Two standard breadboards.
- Wires.
You’ll be able to get all of these from good electronics suppliers, direct or via eBay.
The circuit layout is straightforward:

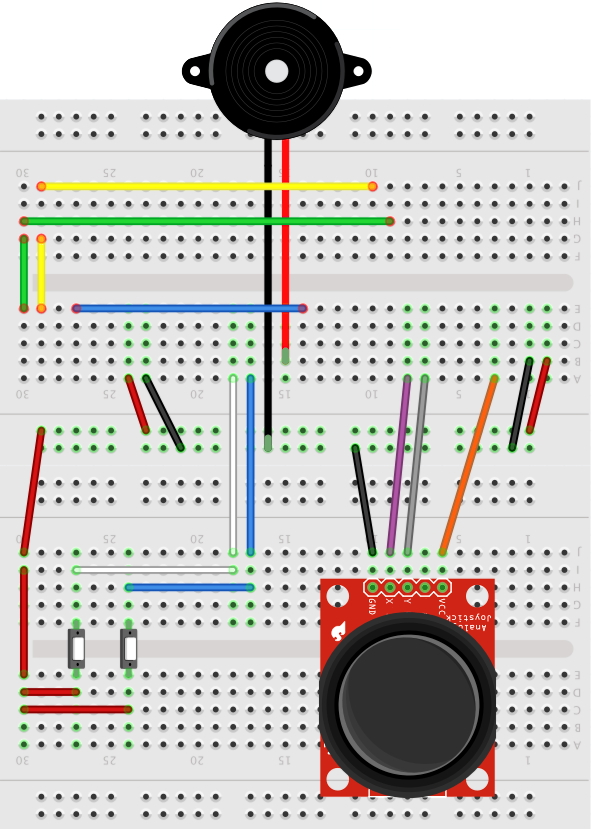
Here’s a version without some of the components so you can see the wiring:
You can find the C code in my Pi Pico repo at GitHub. Compile the code — here are instructions for doing so on a Mac with Visual Studio Code — and copy the .uf2 to the mounted Pico (press BOOTSEL and connect to USB).
The joystick controls movement: step forward or backward, or turn left or right. The left-hand button triggers the laser: press to enable; release to fire. The second button causes you to teleport, but only when you’re standing on the teleport square.
The buzzer provides assorted sound effects, but is used primarily for the Phantom detector: it beeps when one of the monsters is within four maze squares of your position.
Originally presented at 128 x 96 in four colours, my version is not as tall and adapted for a monochrome display. With no source code available, I had to come up with my own graphics and Phantom movement code.

To save time, I hard-coded four maps, but the original generated them randomly. It also included help screens, which have been omitted from this initial version — I plan to add them later. Likewise some of the options: maze complexity selection, Phantom speed (mine get faster as you progress through the levels) and training mode, which might have been necessary in an era when no one had seen 3D graphics on a home micro before, but isn’t now.
But despite these tweaks, I think my version captures the… ahem… spirits of Ken’s original.
More on the Raspberry Pi Pico
- How to build a cellular IoT device with the Raspberry Pi Pico — part two, the code
- How to build a cellular IoT device with the Pico — part one, the hardware
- How to pop up a Picoprobe from the Adafruit QT Py RP2040
- Raspberry Pi Pico proxies: the Pimoroni Tiny 2040 and the Adafruit QT Py RP2040
- Introducing C++ programming on the Raspberry Pi Pico
- Play Hunt the Wumpus, Raspberry Pi Pico style
- How to Debug a Raspberry Pi Pico with a Mac, SWD and… another Pico
- How to program the Raspberry Pi Pico in C on a Mac
- A First Look at a MicroPython Marvel: The Raspberry Pi Pico
