
A wee while back I ordered a Pimoroni PicoSystem to try out. It’s a small handheld games console based on the Raspberry Pi RP2040 microcontroller, and it sports both classic joypad controls and a 240 x 240 16-bit colour display. I gave my first impressions in an earlier post. Here’s what I think after spending some time porting my Raspberry Pi Pico version of the 1980s 3D shooter Phantom Slayer to the unit.

I’ve got to say, it’s a nice little piece of hardware. If I wanted to be picky, I’d highlight the overly clicky buttons and the old school matte tone of the screen — I’d prefer something modern and less diffuse — but then it’s only 60 quid, so you can’t expect too much consumer electronics gloss.
My only major gripe: the sound is rather feeble. OK, the PicoSystem relies on a piezo buzzer for audio output, so it was never going to be great, but it’s buried deep in the metal casing and so lacks volume. The PicoSystem could really do with speaker holes cut into the faceplate, or the addition of a 3.5mm audio jack.
Building games with the SDK
How is it for coding? Pretty good. The provided C++ SDK has a good selection of graphics routines all set within a game architecture that will be familiar to anyone who’s written software for Arduino-based devices. The SDK defines three functions — init(), update() and draw() — which you write and use to construct your game. The first of these is called after the SDK has done its setup work. Tip: make sure you enable the boot logo if you want to avoid a screenful of static at start-up. I call all the Phantom Slayer session-specific set up from here, and queue up a new state machine that governs what takes place during each subsequent pass through update() and draw().
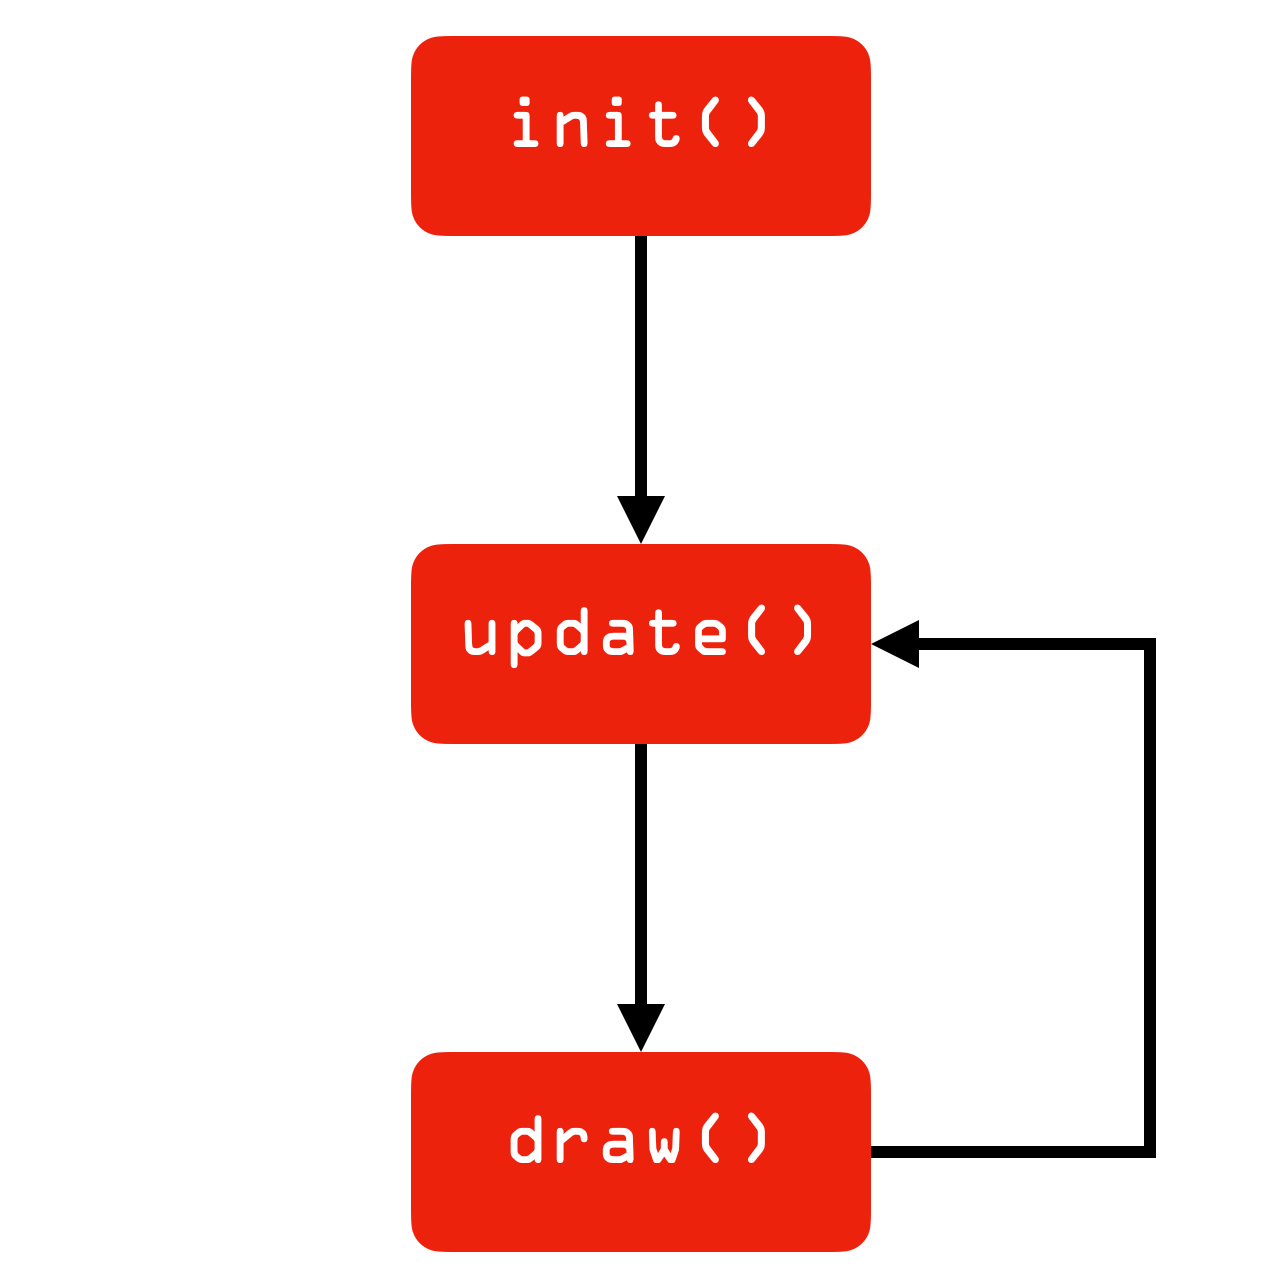
These functions are called by the SDK’s master program loop perpetually every 10 milliseconds once init() returns. The code switches to different actions according to a game-state variable. For example, at the beginning the game state is ANIMATE_LOGO, so update() manages the movement of the Phantom Slayer logo down the screen; draw() just calls a function the blits the logo to the main display buffer, defined by the SDK as SCREEN. After running a sequence of states — ANIMATE_LOGO, ANIMATE_CREDIT, LOGO_PAUSE, OFFER_HELP, SHOW_HELP (if requested by the user) and so on, update()’s code runs the game itself: handling key presses, checking player movement, managing Phantom AI and updating the world. At this stage, draw() renders the 3D maze using routines from my earlier version of Phantom Slayer.
The SDK maintains a screen buffer — two bytes per pixel, with the three primary colours and an alpha channel value spread over each pixel’s four nibbles. All of the SDK’s graphics functions — pixel operations, graphics primitives like line(), circle(), poly() and rect(), and blit operations — write to the buffer. All the primitives come with versions prefixed f that will fill the specified shape rather than draw it in outline. Blitting takes places via an intermediate blending function, which you can set with any of ten built in ones, or another that you’ve written for your game’s specific needs. Just copy bytes for speed, or do alpha blending if you want to overlay a sprite onto a rendered background, for example. Call the SDK function blend() to set the blend function. Call blit() to copy across the pixels. It’ll scale the transferred rectangle too, if you wish.
void draw_phantom(uint8_t frame_index, uint8_t* count, bool is_zapped) {
  Rect r = rects[frame_index];
  uint8_t dx = 120;
  uint8_t c = *count;
  uint8_t number_phantoms = (c >> 4);
  uint8_t current = c & 0x0F;
  game.crosshair_delta = 0;

  // Space the phantoms sideways ccording to
  // the number of them on screen
  if (number_phantoms > 1) {
    if (current == 2) {
      dx = 120 - r.spot;
      game.crosshair_delta = 0 - r.spot;
    }

    if (current == 1) {
      dx = 120 + r.spot;
      game.crosshair_delta = r.spot;
    }

    *count = c - 1;
  }

  // NOTE Screen render frame indices run from 0 to 5, front to back
  uint8_t height = phantom_sizes[frame_index * 2];
  uint8_t width =  phantom_sizes[frame_index * 2 + 1];
  uint8_t sx =  0;
  uint8_t sy =  0;
  uint8_t dy = 120 - (height >> 1);
  dx -= (width >> 1);

  if (frame_index > 0) {
    for (uint8_t i = 0 ; i < frame_index ; i++) {
      sx += phantom_sizes[i * 2 + 1];
    }
  }

  // Paint in the Phantom
  blit(is_zapped ? zapped_buffer : phantom_buffer, sx, sy, width, height, dx, dy);
}
The SDK allows you to set the target buffer away from SCREEN, which is handy if you want to draw into off-screen buffers. Call the SDK function target(). I use this to animate the view when the player turns left or right. I draw the destination view into an off-screen and then reset the primary draw buffer back the SCREEN. Now I just blit a progressively smaller section of SCREEN on top of itself and blit in a slice of the off-screen. The result: a smooth sideways scroll from one forward view to another.
The SDK’s primitives meant I could remove all the ones I’d written for the earlier version’s monochrome OLED panel, and this time I get colour. And sprites, which were a bit of a hack last time. I’m indebted to @dmalec for his code that converts a PNG image into hex values that can be pasted into an array declaration in code. This is how all my sprites were produced, including the big text.
The SDK comes with its own sprite sheet, but you’ll probably want to disable it to save memory if it’s not being used. Just add no_spritesheet(<PROJECT_NAME>) to your CMakeLists.txt file. You can also opt out of the SDK-provided font. I kept it and use it for the help text, but it’s a bit small, so I may change that in a future version. I plan to improve the map storage too into something more efficient too.
Making noises
What my code really lacks right now is good audio output. I’ve got the beep that sounds as Phantoms come within range of the player, but that’s about it. The SDK provides a sound envelope definition system through the voice() call. You then play() a given voice at a chosen frequency and for a specified duration. I can see it’s very a flexible system, modelled on how ‘proper’ games are done, but it leaves you with a lot of variables to tweak as you try to find exactly the sound you’re after. There’s a cute sound explorer app among the SDK’s example code, but I’ll need to spend some time with it to understand the interplay of all the envelope parameters. So I’ve left that until last.

This functionality could do with some further documentation, which is the SDK’s other weak spot. The content is growing and getting better, but you’ll still spend a lot of time poring over the SDK code trying to figure out how it all works.
Still, I now have a game that plays very nicely and smoothly, and is much closer to the original Phantom Slayer than my previous version was. Sure there are some bugs and quirks to sort out, but they’re all with my code, not the underpinning SDK.
You can find the latest code in my PicoSystem Phantom Slayer repo, which includes a pre-built binary (/bin/phantom-slayer.uf2) if you’d just like to try out the game, and demonstrates most of the functions described above.
