macOS 13.0.0 Ventura introduced an irritating problem for all us Mac-based Raspberry Pi Pico programmers: Finder no longer allows you to copy .uf2 files to a mounted Pico. It’s not a forbidden operation, but it does trigger an error that prevents the copy from taking place. This is undoubtedly the ‘new normal’, so here are some ways to circumvent the error. I’ll save the best one until last.

Finder reports the error as an “unexpected” one of code 100093. Looking at Apple’s developer documentation reveals this code is referenced by the #define kPOSIXErrorENOATTR. It’s part of the old, long deprecated Carbon API and dates back to macOS 10.5.
The error’s compiler constant suggests that Finder is attempting to write metadata and/or extended file attributes to the RPI-RP2 USB volume that appears when you connect a Pico to a computer while its BOOTSEL button is held down. Why didn’t it try this before? Maybe it did, but Finder didn’t process the error correctly, or worry unduly about it. Or Perhaps Apple has changed it FAT16 driver — the mounted Pico presents itself as a FAT16 volume.
Certainly copying files from a Terminal by running cp solves this. I’ve read that you need to add the -X flag, which excludes extended attributes (and resource forks, incidentally) from the copy operation, but that’s not actually the case: you can copy .uf2 files without the -X. The script I’ll talk about shortly doesn’t use this flag.
I tried a couple of techniques I have used in the past to see if I could set my system to avoid writing metadata to RPI-RP2:
mdutil -i off /Volumes/RPI-RP2
This stops macOS’ Spotlight from indexing the named drive. However, you have to have the drive mounted to run this command because it writes a .Spotlight-V100 directory to the drive.
I also tried:
sudo defaults write com.apple.desktopservices \
  DSDontWriteUSBStores -bool true
but that’s really to prevent writing Finder’s .DS_Store and AppleDouble files. It’ll also affect any other USB drive you connect. In any case, it doesn’t solve the Finder copy problem.
So here’s the solution I adopted.
You can use special serial port settings to force a connected Pico — ie. one that’s not mounted as RPI-RP2 — to appear as a USB drive. This is very handy because it saves all that messing about holding down buttons and re-inserting USB cables. At the command line you run:
stty -f /path/to/pico/device/file 1200
where /path/to/pico/device/file is how the Pico appears in the /dev directory, such as /dev/cu.usbserial0301.
You can then call cp in the usual way to copy over your .uf2 file.
Note This trick works under Linux too, but users should use the -F flag in place of -f as shown above.
Of course, any terminal operation can be scripted, so you can save yourself a lot of typing by writing a shell script. You can find mine here. It’s a Bash script for compatibility with Raspberry Pi OS — even though macOS uses Z Shell, and I do on my Pis too, not everyone has made this switch — you can use the same approach there, and it’s still quicker than dragging and dropping files.
Save the script as, say, deploy to a directory that’s listed in your shell’s $PATH variable (I use /usr/local/bin), and run:
chmod +x /path/to/script
to make it executable.
Now you can call:
deploy /path/to/pico/device/file /path/to/uf2/file
to auto-mount the Pico as RPI-RP2 and copy across the target file all with a single line:

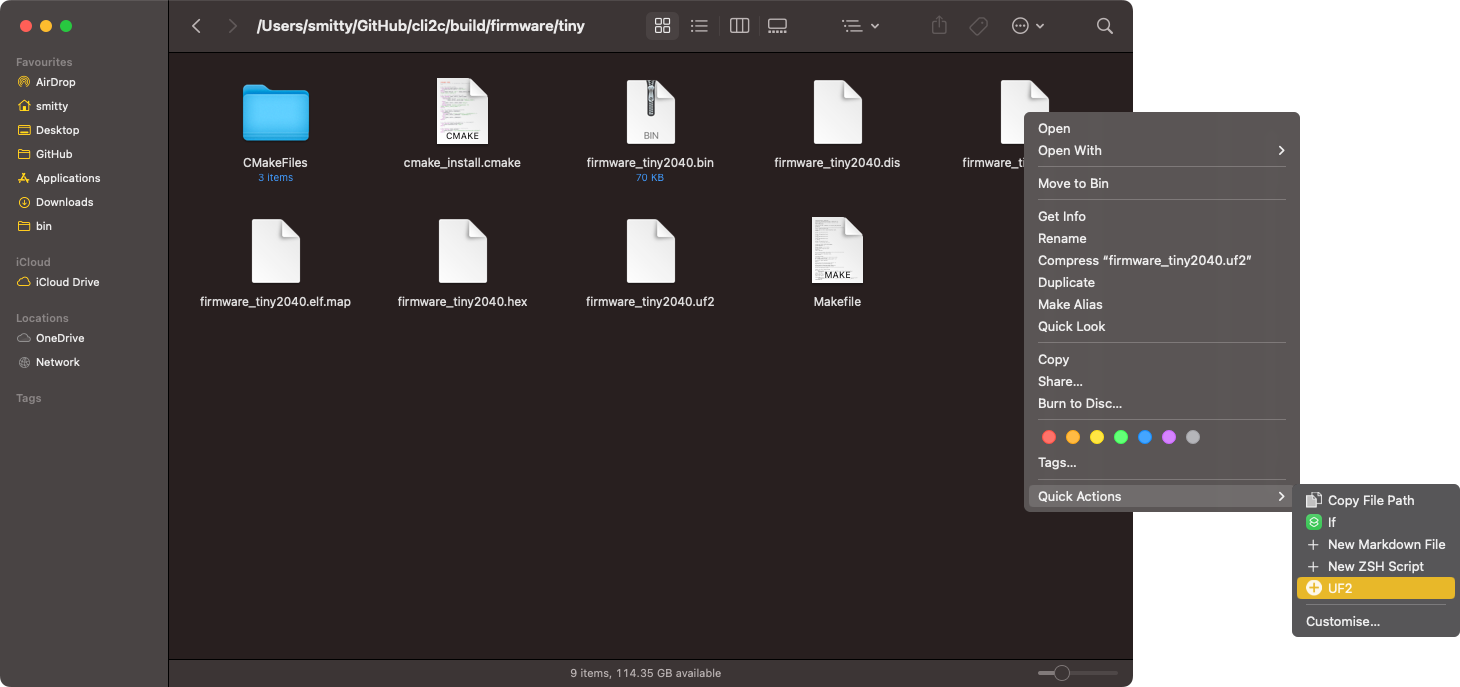
If you really do prefer to use Finder, or want it as an occasional alternative, run the Automator app and create a new Quick Action:
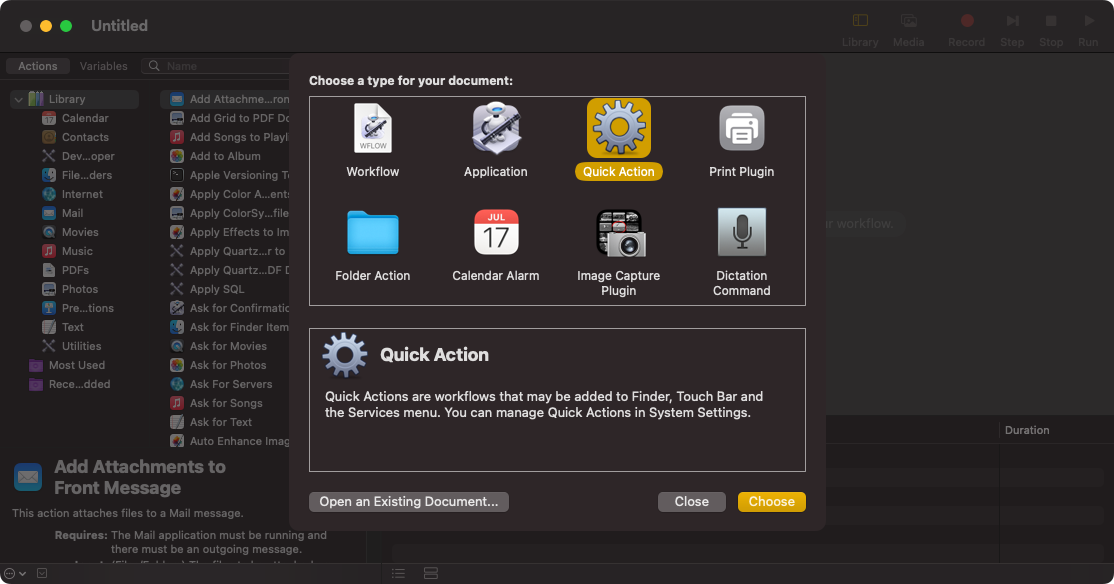
Set the first lot of settings as shown below:

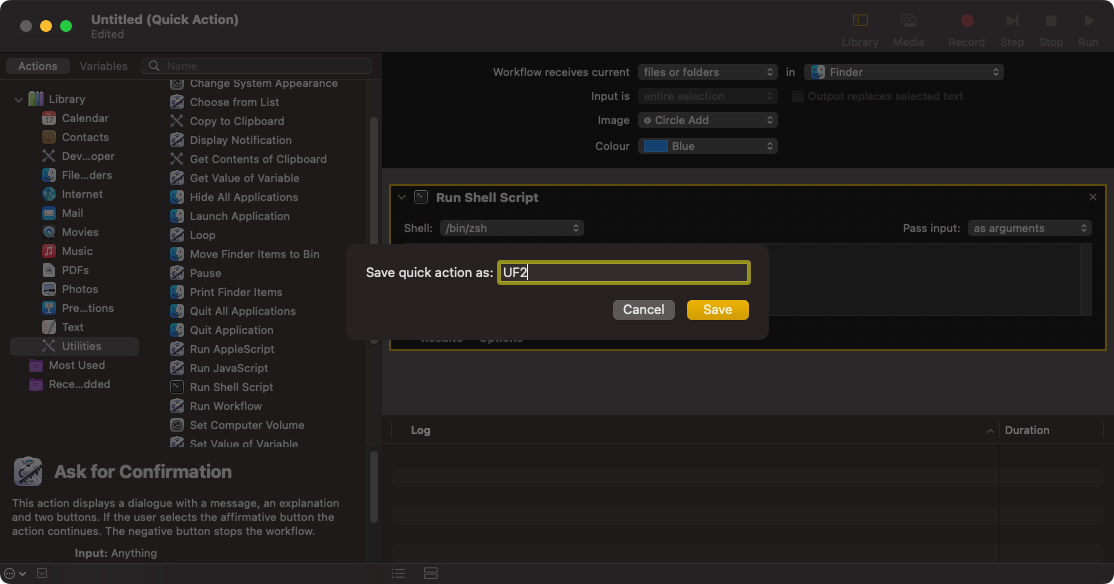
Add a Run Shell Script action from the Utilities column in the library on the left-hand side, and paste in the command
cp $1 /Volumes/RPI-RP2
Make sure you choose as arguments from the Pass Input: menu.
Enter Cmd–S to save and give the action a name, such as UF2:
Now when you right-click on a .uf2 file, select Quick Actions > UF2 from the contextual menu. You’ll still need to mount the RPI-RP2 drive first, of course, and do so manually: