
Bear with me on this one. What really makes the Raspberry Pi what it is? Linux? No, because there are plenty of machines the open source OS will run on. Linux is a Unix derivative; the basis of macOS is FreeBSD, also a Unix derivative.
Sure the Pi is only 40 quid and small, but for me what really makes the Pi stand out from all those laptop and desktop computers is the fact that it makes its microcontroller’s GPIO pins readily accessible through a handy set of header pins. Unlike all ‘serious’ micros, it’s perfect for connecting to and controlling a whole stack of add-ons, including sensors, displays inputs and actuators.

Out of the box a Mac can’t do that, but with Adafruit’s FT232H Breakout it can. This $20 board connects to a host computer by USB and provides the machine with access to many of the same IO pins that the Pi provides. UART, I2C, SPI and GPIO — the FT232H Breakout gives them all to a Mac, and the accompanying Blinka library makes them all accessible to Python, just as they are on the Pi.
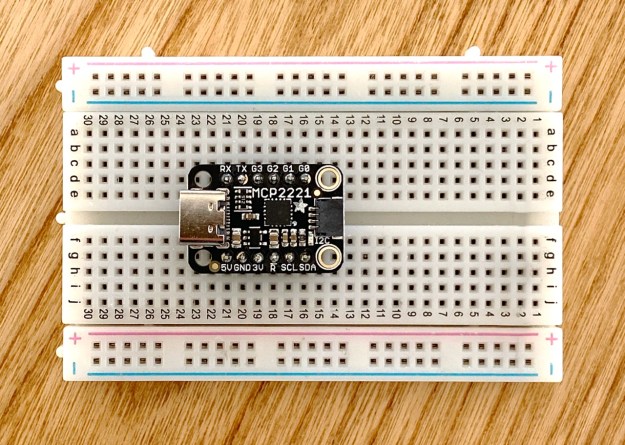
There’s also Adafruit’s £5 MCP2221 Breakout, which provides similar but slightly different functionality (no SPI, for instance, but it does have analog IO, which the FT232H lacks).
The use of these adaptors appeals to me because it means I can do on my main machine all the experimental things that I do on a Pi. Sure it’s never going to replace a Pi Zero in a match box as a remote sensor module, but I can do all the development on my nice big LCD, on a fast processor backed with plenty of RAM, and then copy the Python code over to a Pi wired up to the same sensors and such.
I’ve been playing with the FT232H Breakout for a little while, and it’s every bit as easy to use as a Pi. It has no Hats (but see below), but I’m not using GPIO to combine two devices into a third — I just like connecting components and messing about.
Want to get a text message when your desktop gets moved? Now you can, with an accelerometer wired to the FT232H’s SPI bus and a script running on the host to check for movement and, in response, trigger an SMS via Twilio’s SMS API.
All those projects where you add a display to a Pi and present CPU utilisation, total memory usage and network traffic flow on a small OLED, a set of seven-segment LEDs or an e-paper screen, well now you have have them on your main computer too.
In a recent post, I wrote about connecting a NeoPixel to a Mac via the FT232H and using it to signal notifications. To recap the installation process for a Mac:
brew install libusbpip3 install pyftdi adafruit-blinkaecho 'export BLINKA_FT232H=1' >> ~/.bash_profile- Restart Terminal
The process for the MCP2221 Breakout is similar:
pip3 install hidapi adafruit-blinkaecho 'export BLINKA_MCP2221=1' >> ~/.bash_profile- Restart Terminal
Now it’s just a matter of wiring up either Breakout like you might a Pi. For example, you can plug in a seven-segment LED array:

There’s Python code in my FT232H-Mac repo you can run to display system info on the LED:
- cpu.py — Show CPU activity as a percentage.
- network.py — Show networks packet sent out; returns to 0 after 9999 packets.
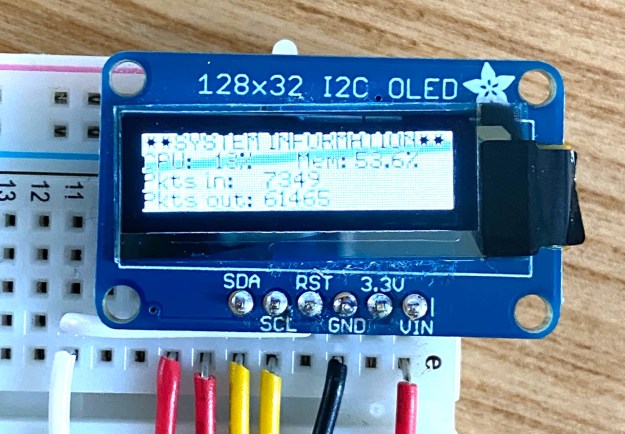
These are simple demo apps, and there are a couple of others in the repo, but can serve as the basis for your own code: they demonstrate how to drive the display and to access system info. The same system state readings can be used with a different display to create a more sophisticated system monitor using an 128×32 OLED panel:

Again, there’s code in the repo to show this in action. And there are some graphics and fun examples too. There are also versions for a 128×64 OLED, which is also supported in my MCP2221-Mac repo. Here’s the circuit for the MCP2221 Breakout and 128×64 OLED:

Your app needn’t just drive output like a screen; it can receive input too. A simple button can be used to trigger action on the host machine.

For example, this code uses the circuit above to launch an app on the host Mac. You can easily adapt it trigger a different action, or add further buttons — the FT232H Breakout has 16 digital IO pins you can connect to — to create an array of physical triggers. Again, the repo has other GPIO examples that will hopefully inspire you.
Incidentally, the FT232H provides UART (serial) support, but this isn’t provided by the Blinka library, but directly. Once the Breakout is plugged in, run ls /dev/cu.* to find its Unix file representation. For example, mine are /dev/cu.usbserial-1470 and /dev/cu.usbmodem14701, respectively; yours will be the same or similar.
With the file representation, you can use command line tools like screen or the Python library PySerial to communicate with UART-connected devices directly or programmatically:
import serial
uart = serial.Serial("/dev/cu.usbserial-1470")  # open serial port
uart.write(b"Hello, world")                     # write a string
uart.read_until()                               # Wait for a response terminated by a newline
uart.close()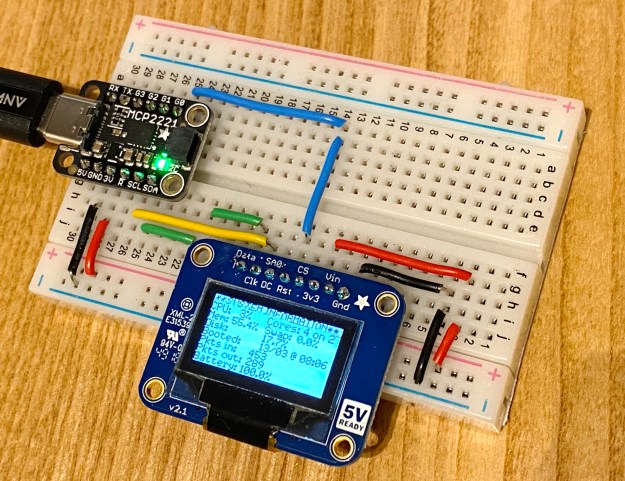
HAT Story
Thanks to the web site pinout.xyz, you can get pin assignments for most Raspberry Pi HATs and wire up the relevant pins to your Breakout.
