
Not so long ago, a hardware hacker called Jimmie Rodgers decided to solder 126 LEDs onto a small board that could be plugged into the Arduino microcontroller kit. He dubbed it the LoL Shield: ‘LoL’ for ‘lots of LEDs’, and ‘shield’ because that’s that’s what Arduino add-ons are called.

LoL Shield is a fun display for electronics projects, but it requires an Arduino board to control it. Deciding that Raspberry Pi fans could probably use something very similar, UK-based Ciseco, which makes and sells a range of add-ons for board computers, took Jimmie’s idea and recast it as Pi product.
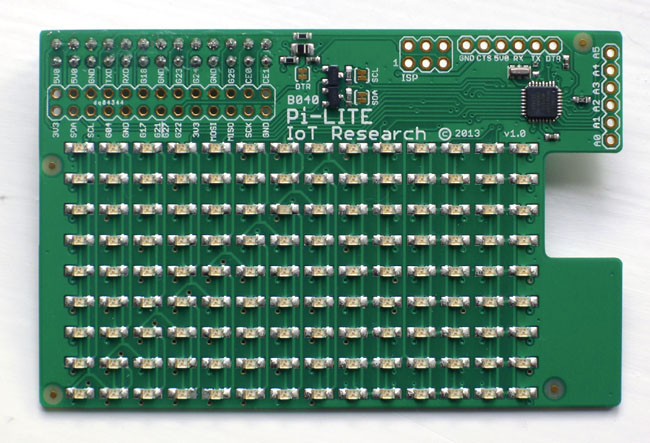
The result is the Pi-Lite, a £20 board containing not only an 14 x 9 array of red LEDs but also its own Arduino chip and firmware to run on it through which the Pi can control the lights, each of which is individually addressable. Where Rodgers used big, home electronics project LEDs, Ciseco has fitted surface-mount micro LEDs not dissimilar to the ones used on the Pi itself. Like the LoL Shield, the Pi-Lite uses a trick called ‘charlieplexing’ to send the LED-lighting signals over just a few IO pins, though it comes at the cost that one duff LED will ruin the whole board. The Pi-Lite clips directly onto the Pi’s GPIO header, though it only uses the 5V power source pin – the Pi-Lite draws 49mA – and the UART serial port for data.
Getting Pi-Lite up and running is easy. A little bit of Linux system file tweaking is required to make the Pi’s serial port is available for the add-on rather than as an output for boot information: sudo nano /etc/inittab and comment out this line: T0:23:respawn:/sbin/getty -L ttyAMA0 115200 vt100
sudo nano /boot/cmdline.txt and remove this text: console=ttyAMA0,115200 kgdboc=ttyAMA0,115200 from this line: dwc_otg.lpm_enable=0 console=ttyAMA0,115200 kgdboc=ttyAMA0,115200 console=tty1 root=/dev/mmcblk0p2 rootfstype=ext4 elevator=deadline rootwait so it becomes: dwc_otg.lpm_enable=0 console=tty1 root=/dev/mmcblk0p2 rootfstype=ext4 elevator=deadline rootwait
Finally, sudo reboot to restart the Pi to set the changes.
The Pi’s GPIO serial port is made available through the /dev/ttyAMA0 virtual device, and once the set-up adjustments have been made, you can use Linux’s echo command to send text to the Pi-Lite: sudo echo $'Smittytone on Pi-Lite' > /dev/ttyAMA0, for instance.
Ciseco’s documentation guides you through installing and using the Minicom terminal emulator, which you can use if you want a more interactive experience: what you type appears immediately on the Pi-Lite’s panel of LEDs, automatically scrolling across the array, thanks to the firmware pre-loaded on the card.
Key in three dollar signs and Pi-Lite enters command mode. Commands need to be entered in upper case – the Caps Lock key is a boon here – and reasonably quickly because the Pi-Lite will automatically drop out of command mode after a second or so.
The available commands are rudimentary but allow you to work with pixels and text. You can set the auto-scroll speed, switch individual pixels on or off, switch the entire LED array on or off, and enter a 126-character string of 1s and 0s representing a character bit pattern to create some basic graphical glyphs – there’s a limit to what you can do on a display with a 14 x 9 resolution, after all – and text, and animate them.
Other commands provide more specific usages: you can illuminate a column of LEDs, for instance, by specifying the column and a percentage value to represent the height of the lit column. This is for bar graphs and such. There’s a row illumination command too, but it has been designed to enable horizontal Vu meter-type displays, so it covers two rows at a time. The Pi-Lite has points on which to solder pass-through pins for the Pi’s GPIO You can place a text string at a particular column and row, but you can’t set the size of the text – though, as I say, with a low-resolution dot-matrix display you don’t have much room for manoeuvre in any case.
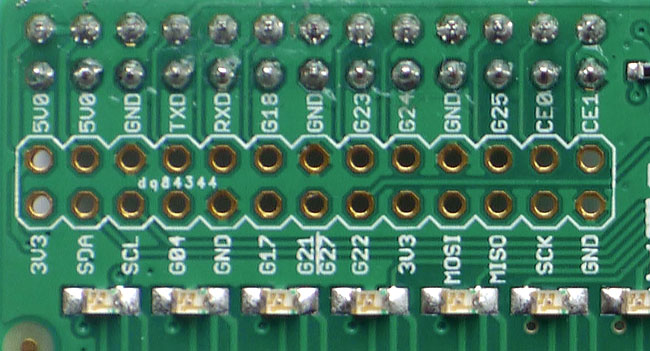
 The Pi-Lite has a GPIO pass-through header, and is an Arduino board in its own right
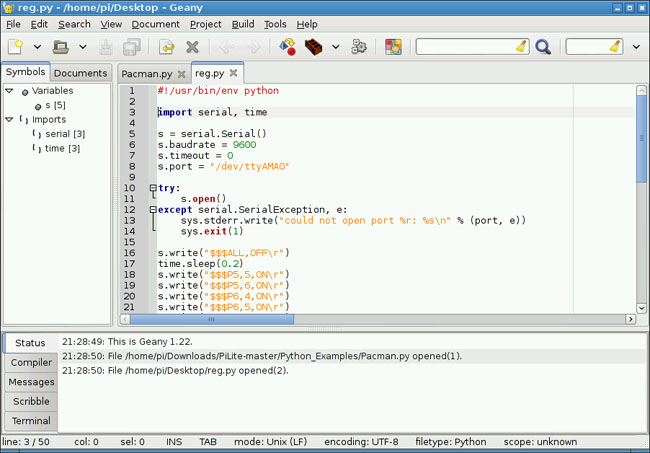
What commands there are are all good stuff, but ultimately of limited use when pumped through echo or directly through Minicom. The LED array really doesn’t come into its own until you make use of it programmatically. All of the Pi-Lite’s commands can be used in Python programs simply by importing the python-serial library with sudo apt-get install python-serial and then writing them out as strings to the Pi-Lite’s serial port.
With deft use of the timer library’s sleep function and Pi-Lite’s ALL.OFF command, you can code up some cute animation.
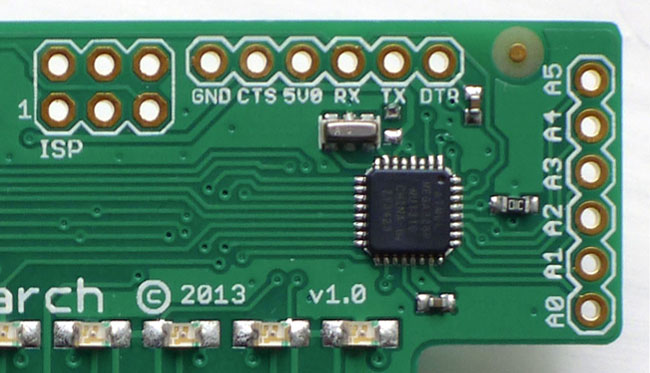
Since the Pi-Lite is based on the Arduino ATmega328 chip, it’s also possible to write code that will run directly on the microcontroller. Your Pi will have to be loaded up with the standard Arduino development tools, of course, but quirks in the Pi’s approach to GPIO and serial connectivity mean you also have to do a little more to get Arduino programs – ‘sketches’, in the jargon – uploaded to the Pi-Lite than simply installing and running the Arduino IDE.
Ciseco has plenty of instructions, but there are many steps to perform and a fair few of are likely to be daunting to the newbie, not only because of their opacity but because it’s so easy to miskey a filename or script instruction and have the whole thing break. The number of steps makes tracking down your error or errors that bit harder, and I found some minor errors that Ciseco itself had made. I’ve passed these on, so hopefully the documentation will be updated.
Of course, any user likely to want to upload code to the Pi-Lite’s Arduino underpinnings will probably have no trouble sorting through the documentation, and those who find setting up the Pi this way too formidable a challange have the easier option of using the pre-installed commands in their Python programs.
Ciseco could, however, do a little more to make the different levels of working with the Pi-Lite – direct input, Python coding, Arduino sketch programming – more clear to readers of its documentation so they can better choose which level is best for them. Best, for example, to separate the Pi-specific information from guidance from using the Pi-Lite on its own, and not mix them up as Ciseco currently has.
The Pi-Lite documentation isn’t bad: it could just do with a little re-organisation. As is the case with most of these kinds of products, the instructions are a work in progress and being constantly revised and updated, so I expect they will improve over time.
Verdict
Ciseco has come up with a simple, fun accessory for the Raspberry Pi that’s sufficiently inexpensive to grab just for a ’see what it can do’ even if you don’t have a specific usage or project in mind.
Unlike the Arduino-oriented LED arrays which inspired the Pi-Lite, the Ciseco kit comes with its own on-board software interface so it’s easy for newbies and Python fans with more experience to get using out of the box. In fact, you can send it things to display straight from the terminal.
The only flaw, from a beginner’s standpoint, is the need to tweak key system files first. But you can’t blame Ciseco for that; it’s the way the Pi is configured by default. And, heck, that kind of tinkering was what the Pi was created to make possible.
As, of course, was mucking about with fun hardware like the Pi-Lite. Every Pi owner’s kit box should have one.
A modified version of this review first appeared on The Register
