
I’m enjoying tinkering with the Raspberry Pi. Alas most of the tutorials and guides available online, of which there are many, focus on hooking the tiny board computer to Windows or Linux machines. Mac-centric guidance is sparse, and I could have used some this week.

The Pi has 26 general purpose IO ports on board, two of which can be used for UART (Universal Asynchronous Receivers/Transmitters) communications. The Pi hooks its UART pins to a login console at boot, and it should be straightforward with a suitable USB-Serial adaptor — I have the TTL-232R-3V3 from FTDI Chip — to view the results of the start-up process on a terminal window in Mac OS X. I bought my cable from Farnell, by the way — it terminates in three female connectors ready to slot onto the Pi’s GPIO pins.
Downloading and installing FTDI’s drivers is the work of a moment. Installing Z-Term, a terminal emulator application that I’ve been using to hook up Macs remotely since the late 1980s, is easy too. It’s written by David Alverson and is free to use, though he’ll happily accept donations if you’ve found Z-Term useful.
Plug the TTL cable into a spare USB port, open Mac OS X’s own Terminal, use the cd command to switch to /dev, the devices directory and then run ls *cu* to get a list of devices, one of which is the cable. You can ignore the Bluetooth ones. My ls output was:
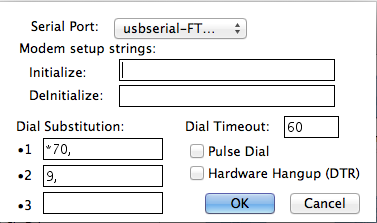
cu.Bluetooth-Modem cu.Bluetooth-PDA-Sync cu.usbserial-FTWHFLU9In Z-Term, go to the Settings menu and select Modem Preferences… Here, select the usbserial option in the Serial Port pop-up. Next, go to the Connection… options on the Settings menu. Most of the settings you can leave as they are, but up the speed to 115,200, unless you want to experience the same problem I did at first.
The Raspberry Pi’s 26 GPIO pins run in two rows in the bottom right corner of the board if you arrange it with the SD card on the right side and the USB ports on the left. The even-numbered pins run along the bottom row, right to left starting at 2. Pin 8 and 10 – respectively, fourth and fifth from the right — are the UART pins, and to these you connect the cable’s yellow and red leads, yellow to pin 8 (UART out [TX]) and red to pin 10 (UART in [RX]). Pin 6, the third one along from the right, is the 0V ground pin, and this gets the black cable. Make sure to take care to get this right: connecting the wrong pins could short your Pi which might kill your cable, the Pi’s ability to send data over UART or both.
Your set-up should look like this:
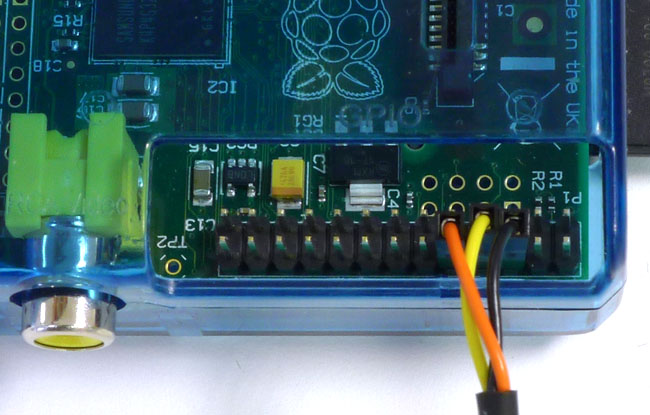
WARNING Check your connections and check them again before connecting the Pi’s power. Incorrectly placed connections can fry your Pi.
It’s tricky to fit the female connectors separately. Better to hold them as one and slide them onto their pins simultaneously.
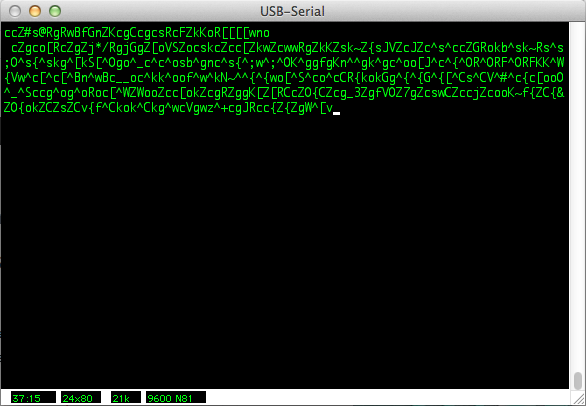
Checked the connections? If they’re correct, you’re now ready to power up the Pi. Now, I’d previously selected 9600 as my Z-Term speed, experience telling me its best to start a connection at a slow speed, make sure it works and then go up to a higher speed. Unfortunately, all I got out of Z-Term was a long sequence of garbage characters:
Googling for a solution yielded only a Stack Overflow post from someone who’d had broadly same experience. He solved it by downloading an FTDI Windows-only tool to change settings in the cable’s firmware. Fortunately, I have an old Windows 7 machine I use for this kind of thing, so I gave it a try. FTDI’s software is unfriendly but even were that not the case, I’d still have found that making the suggested changes had no effect. So I reset them back to where they were at the start.
I tried various Z-Term options, including upping the speed by clicking on the speed readout on the open Z-Term window frame, but all without joy. I found the answer by accident: set the speed and then select Reset Terminal from Z-Term’s Misc menu. This appears to force the change to take effect. Restarting the Pi now produced the correct boot message sequence and, eventually, the Pi login prompt.

Login in as requested and you have full access to the Pi’s command line.
Incidentally, I later discovered that you can do this with Mac OS X’s own Terminal, courtesy of the screen command:
screen /dev/cu.usbserial-FTWHFLU9 115200Make sure you append the 115200 to set the correct speed or you still won’t see anything useful. The code after the /dev/ is the device name you found earlier using the ls command.
