
I recently had a rather large number of screenshots to process: specifically to crop them down to a small area about a third of screen width in and two-thirds of its height down. I could have done this manually, but it’s easy enough to make mis-crops when you’re cropping a couple of images by eye, let alone a 100 or so. The solution? Get your Mac to do it for you. Here’s how.

I’ve mentioned macOS’ command line graphics file processor sips before. It has a useful switch for crop operations called --cropOffset which lets you specify the top-left pixel of the crop area. This switch has two arguments: the distance in pixels from the top of the image and the pixel distance from the left edge of the image.
Rather than write an ad hoc script to run an offset sips crop operation on the hundred images, I decided to add support for the feature to my Mac command line batch processing utility imageprep. Version 6.2.0, released late last year, allowed you to select Photoshop-style corner and edge crop anchor points. The new release of imageprep, 6.3.0, lets you specify x and y co-ordinates at which the crop area will be placed.
Here’s an example.
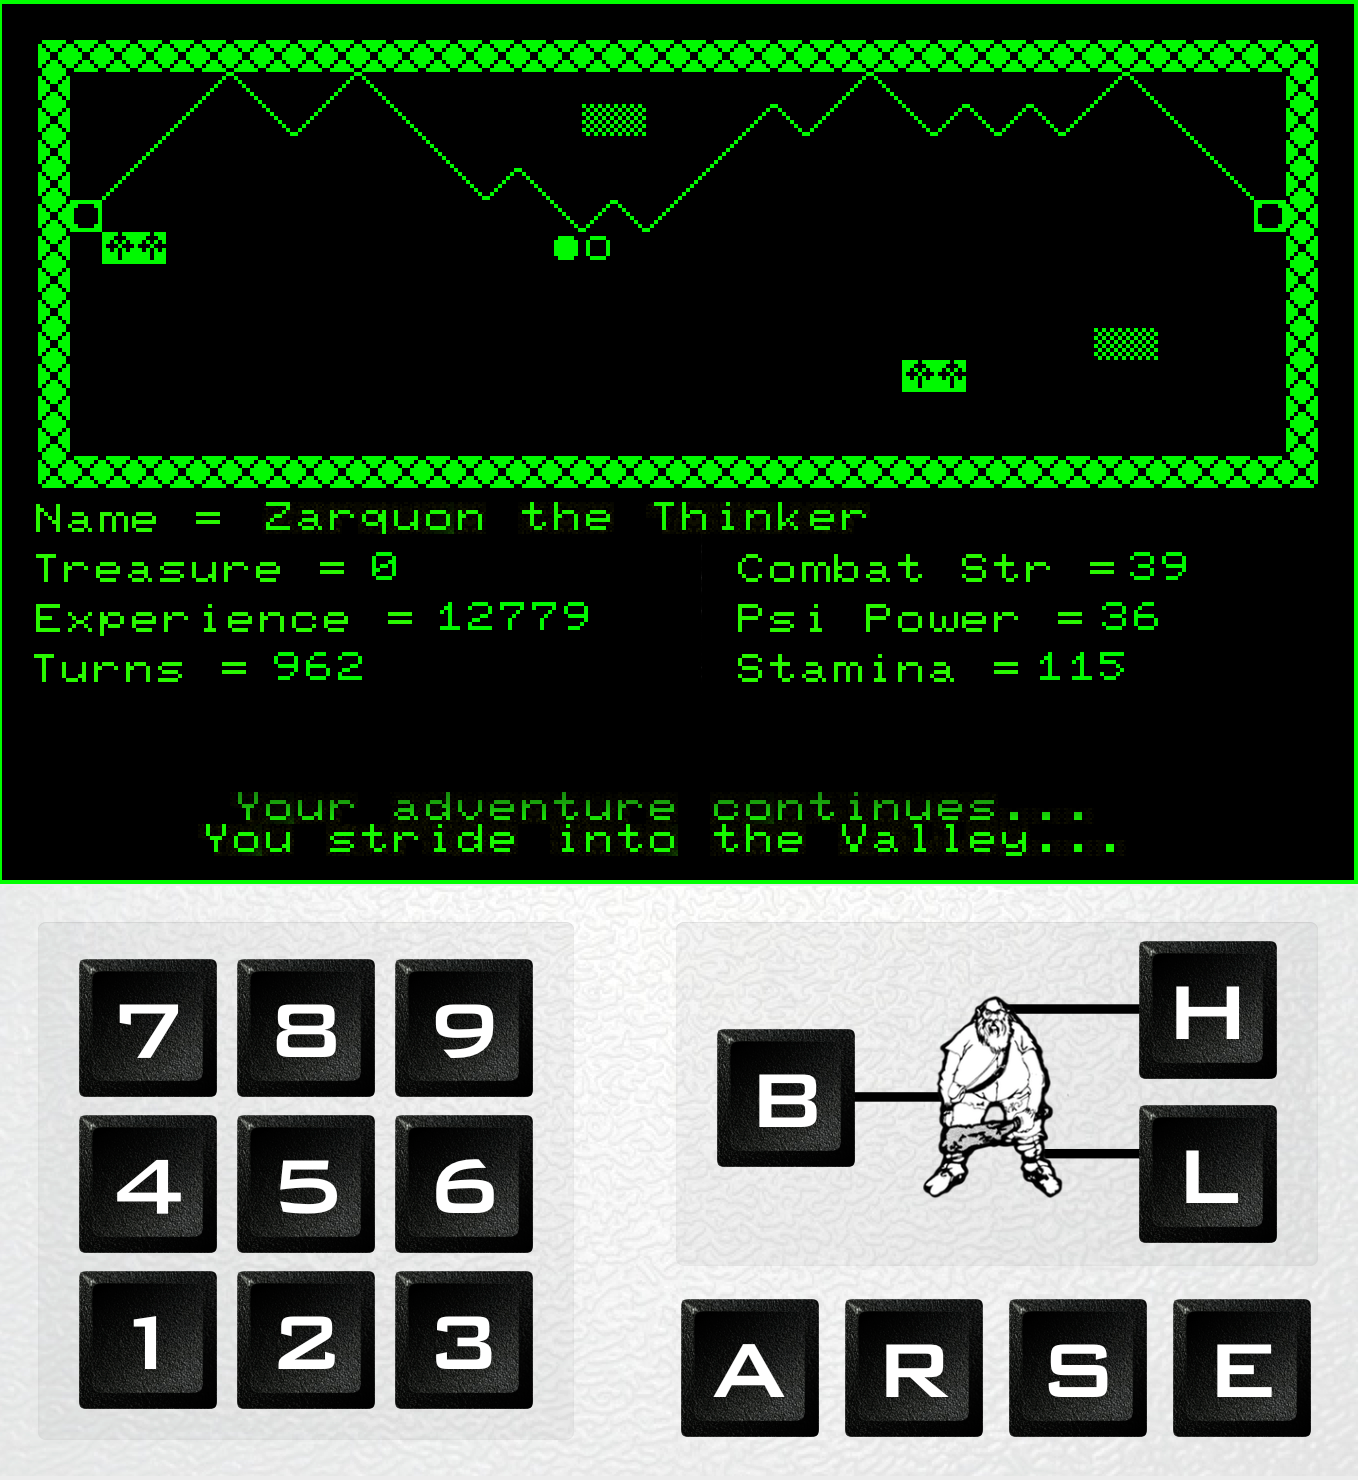
Imagine you have a 1436 x 1568 screen shot and you want to ditch all of it but for a 1356 x 476 area toward the top, but not reaching the left,right or upper edges. More to the point, you have 200 images you need to process this way.
Say the images are in a Source folder in your home folder and you want to put the results on the desktop. This is what you’d call:
imageprep -s "$HOME/Source" -a c 1356 476 --offset 38 44 \
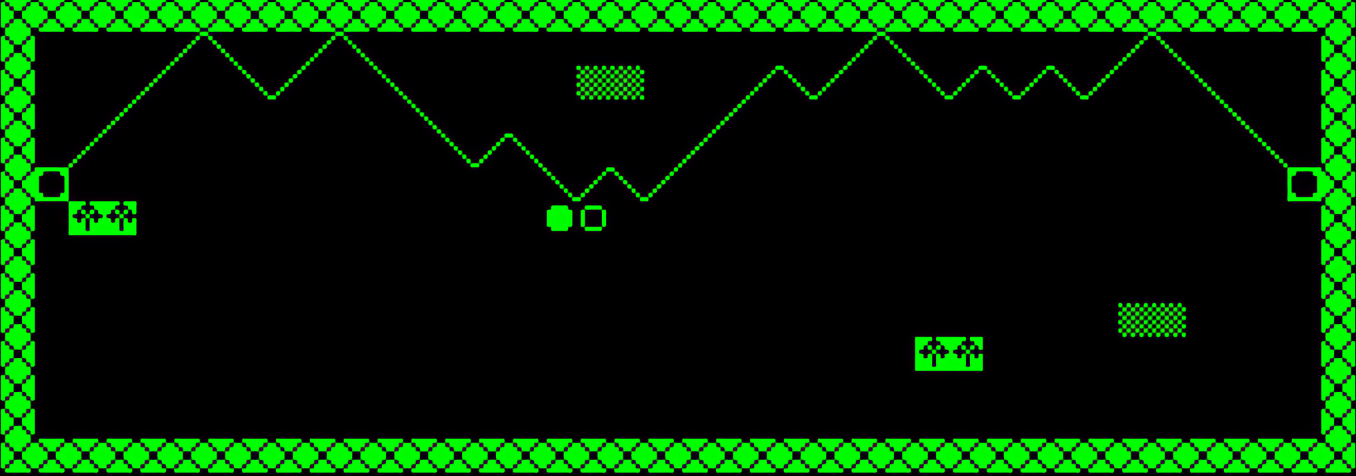
-d "$HOME/Desktop" -kimageprep will run through all the image files in "$HOME/Source", perform the crop and put the results on the Desktop. The -k flag prevents it from deleting the originals. Here’s the result:
Let’s say you needed to scale the output to 200 x 100, you could do that all in one go:
imageprep -s "$HOME/Source" -a c 1356 476 --offset 38 44 \
  -a s 285 100 -d "$HOME/Desktop" -k
So that’s a scale (s) action (-a) after the crop (c) action. The order is important to ensure the operations occur in the sequence you want. Alternatively, you could pad the result out with a colour, change the resolution or the file type.
You can find out more about all the other things imageprep can help you with over at my website, along with download instructions for direct installation or using Homebrew.
