
You don’t need a mouse when you’re using an iPad, right? That’s Apple’s view, but it’s not mine. If you use an iPad as a small, very portable laptop — maybe you have the iPad’s Smart Keyboard add-on — then you don’t necessarily want to be moving your hand up to the screen every time you want to point and click.

Well I don’t anyway. I’ve been using the mouse and keyboard combo since the late-1980s so it’s far more natural to me to reach for a mouse than to reach for the screen. Sure, it’s different when I’m using my iPad as tablet, but I’m talking about using the iPad in laptop mode.
So I’d very much like to use a mouse alongside my iPad. iPadOS wants to be a more productivity centric than iOS, and it is, but it won’t be comparable to macOS until it gets true mouse support.
But that doesn’t mean it can’t be operated with a mouse right now. It can, and here’s how.
You’ll need a mouse of course, but not — bizarrely — an Apple-branded one, even though it has to be a Bluetooth model. I choose Logitech’s 20-quid Pebble.
So, go to Settings > Accessibility and then scroll down to Touch. Tap it and then tap Assistive Touch. Switch Assistive Touch on. You’ll see a circular symbol appear on the screen. Say hello to iPadOS’ pointer:

Scroll down to the Pointer Devices and tap Devices. Now tap Bluetooth Devices… then turn on your Bluetooth mouse, which you’ll need to put into pairing mode. iPadOS will see the mouse and offer to connect to it. When you’ve done so, move the mouse; point and click.
This is a hack, of course, but only sort of. The mechanism you’re using is intended to help folk who have trouble using their fingers. However, us mouse users can adopt it in place of ‘official’ mouse support.
There’s no right-clicking for secondary menus — you have to continue to click and hold for the cut, copy, paste contextual menu, for example. But you can manage your mouse’s buttons — select the mouse in the Bluetooth Devices… list (but not in Settings > Bluetooth) and you can pick from a very large selection of options what the left, right and centre (usually pushing the scroll wheel) do when clicked:
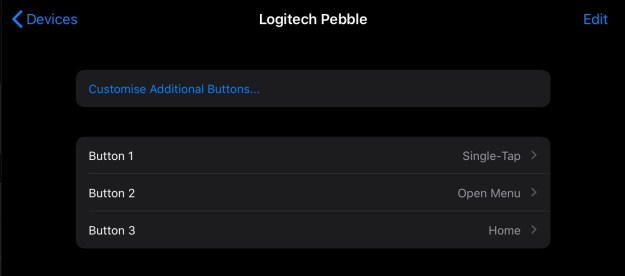
Right-click defaults to a special iPadOS menu, shown below, that gives access to specific iPad features. You can customise this by going to Settings > Accessibility > Touch > Assistive Touch > Customize Top Level Menu. There is a lot of choice here, including Siri Shortcuts.
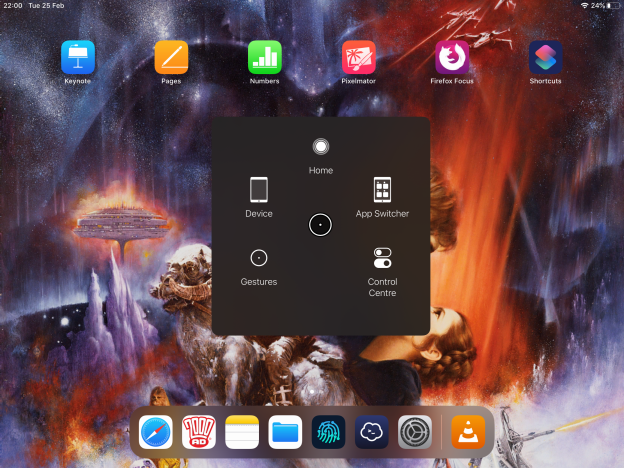 Mine’s set up to make multitasking more accessible and to give quick access to home, the app switcher and the control centre. I’ve found this really improves the speed at which I can work.

It’s not exactly like using a mouse on a laptop or desktop, but it’s close enough. Double-clicking on a word in a text entry area, for example, and up pops the usual character selection handles. These are much easier to manipulate with a mouse and pointer than with a finger. Scrolling with the scrollwheel is backwards (ie. like macOS’ non-traditional direction), but you can get used to it — and you can still click and drag. But image editing with an app like Pixelmator becomes a joy rather than a challenge.
This entire post was written on an iPad plus mouse. It involves a level of multitasking — pulling the copy in from a text editor; moving back and forth between the browser, the photo gallery for screenshots and a picture editor to crop them; getting and pasting website links — that would have taken much, much longer without the productivity boosting setup described above.
Come on, Apple, make mouse support standard in iPadOS.

You have removed one of the few remaining barriers to finally buying an iPad Pro. Combined with a recent spate of articles combining the iPad Pro with a Raspberry Pi, the only barrier is now finding a recent refurb on sale. Thanks!