
The Raspberry Pi is notoriously tough on micro SD cards, which were never intended to be used as primary computer storage.
The Pi 4’s USB 3.0 bus presents a high-speed alternative to the SD card… almost. Unfortunately, you can’t yet boot the Pi 4 off a USB 3.0-connected drive (as you could with the Pi 3) but you can at least use USB for your primary storage and retain the Pi’s micro SD card solely for boot duties. This minimizes the risk to this fragile medium.
Update Check out my new post which will show you how to boot from a USB disk without keeping your SD card.
All writes, including virtual memory, are made to the connected USB storage, which is typically rather more resillient. So how is it done?
You’ll need a full installation on micro SD card, but it doesn’t have to be a fresh install. Connect a USB drive to a USB 3.0 port and then run
sudo fdisk -lto get the device file, eg. /dev/sda, that it is associated with by Linux. If it’s the only connected drive, it will almost certainly be /dev/sda, and that’s what I’ll assume here.
You should also see some /dev/mmcblkp0 entries. These are the SD card: the boot partition and the current primary storage. Take care not to perform any of the following operations on these partitions or you’ll need to reflash the OS on the card.
Enter
sudo fdisk /dev/sdato prepare the USB drive. Type p to list the drive’s partitions. Most likely it will only have one. Naturally you want to make sure you’re using an empty drive otherwhise you’ll lose all the data on it: we’re going to delete the partition, by typing d. If you have more than one partition, hit d again for each of them.
Now make a new primary partition: hit n then, when prompted, p to create a primary partition. From this point just keep hitting enter to accept the default settings.
When fdisk is done, hit w to write the partition to the drive. fdisk will quit when it’s done.
You now have a drive containing a single but empty partition; you need to write a filesystem to it. Enter
sudo mkfs.ext4 /dev/sda1to do so. Here, /dev/sda1 is the file associate with the new partition rather than the drive itself.
You now have a USB 3.0 drive formatted for Linux use, but it has no data. To write files to the disk, we need to mount it within the file system. So first enter
sudo mkdir /media/usbdriveand then
sudo mount /dev/sda1 /media/usbdriveThis creates a directory within the primary filesystem and then connects the USB 3.0 drive to that directory for reading and writing.
We can now duplicate our primary partition (on the micro SD card) on the USB 3.0 drive, which we do by entering
sudo rsync -avAX \
--exclude={"/dev/*","/proc/*","/sys/*","/tmp/*","/lost+found"} \
/ /media/usbdrive
Yes, that’s a single slash in the middle; it’s root, the top-most directory in the primary filesystem. The contents of your micro SD card’s main partition will now be copied over in its entirety. This may take some time.
The last thing to do is to tell your Pi to use the new drive. Enter
sudo nano /boot/cmdline.txtto edit the key start-up file on the micro SD card’s boot partition. Look for the entry — they’re all in a line, separated by spaces — like root=PARTUUID=6cba94aa-02. Immediately after it, after a space, type in
root=/dev/sda1Make sure you also have a space after it, before the next entry. You don’t need to delete the first root=... — its value will be overridden by the second, and keeping it allows you to easily switch back to the SD card if you need to.
The cmdline.txt settings should include rootfstype=ext4 rootwait, but if they’re not present, add them at the end now. Again, make sure there are spaces between the settings.
Note You can get the new drive’s own PARTUUID with the following command:
sudo blkid | grep UUID=
Hit ctrl-x then type y to save the changes. Enter sudo shutdown -r now to reboot the Pi. It will boot off the SD card, but now use the USB 3.0 drive as primary storage. Use your computer as you usually do, but make sure you don’t remove the USB 3.0 drive.
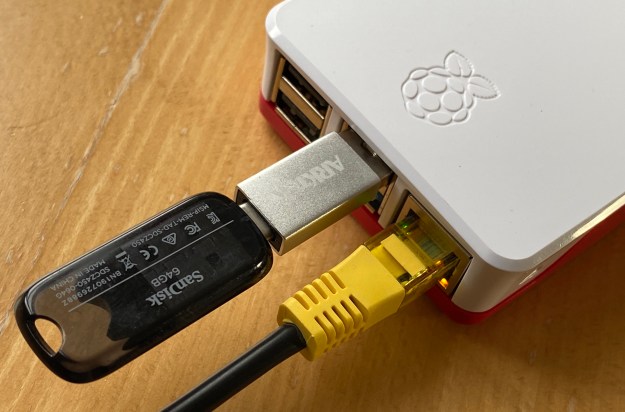
To try this out, I used a 64GB SanDisk Ultra USB-C flash drive I had going spare. I connected it through a no-name USB-C to USB 3 adaptor I picked up for a couple of quid on Amazon. It’s not the fastest drive but it’s noticeably quicker than the SD card. Most folks doing this upgrade use a laptop-class SSD connected using a suitable adaptor. Take note, though, that the Pi 4 can be picky about such adaptors; some will work, others will not. For example, I also tried a spare Intel 2.5in SSD in a USB 3.0 enclosure, but the Pi wouldn’t start up correctly.
A good resource to check is James A Newman’s blog which tracks suitable USB adaptors for mSata, M.2, SATA and other drives. It also has benchmarking code you can run to measure the upgrade’s performance: here’s mine. At 1371 it’s better than an SD card but not a patch on an M.2 SSD (score: 8857) which is the way to go if you can afford it (£65 for a 500GB drive, £8 for an adaptor).
And it’s easy to upgrade to another drive at any time. Just follow the procedure above to prepare the next drive and clone your current primary partition to it. Shut the Pi down, remove the ‘old’ drive and reboot to use the new one.

Thanks for the post! I would advise to use rsync with some exclusions. The Arch wiki has a nice example https://wiki.archlinux.org/index.php/Rsync#Full_system_backup.
This really is helpful, the Raspberry Pi 4 should have come with the ability to boot from USB out of the box, as the SD card puts a serious bottleneck in its abilities.